DVS-200

How to Stream to Facebook and YouTube with DVS-200

How to Stream to Facebook and YouTube with DVS-200

How to Stream to Facebook and YouTube with DVS-200

Nov 03 2020 | DVS-200
How to Stream to Facebook
and YouTube with DVS-200
 

This guide will walk you through setting up our NVS-25 hardware encoder to stream to both Facebook Live and YouTube Live by using our DVS-200 Cloud Server software.

Facebook and YouTube were chosen for this guide because they are popular streaming services (aka Content Delivery Networks, or CDN's) that are free to use. You can easily substitute or add the services of your choice by following the general concepts of this guide.


While this guide simplifies the setup process, it helps to understand a few streaming basics before proceeding. This guide will feature some additional tips throughout for those who are new to streaming.


This guide is divided into 5 sections for easy reference:

1:   How Fast Is Your Connection?
2:   Installing DVS-200
3:   Setting Up NVS-25
4:   Connecting to Stream Services
5:   Setting Up DVS-200


How Fast Is Your Connection?


First, it's important to know the location's upload speed, which is measured in megabits (Mbit/s or Mbps).


Note: This is not the same as megabytes (MB/s), as there are 8 bits to 1 byte. That means if you have an 8 Megabit per second upload speed, under ideal conditions you can upload 1 Megabyte per second. [More on Data-Rate Units]


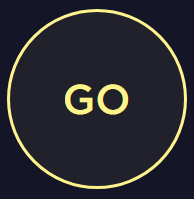
To stream HD video following this guide, visit speedtest.net, click the GO button, and view the upload speed results. You should have between 8 and 12 Mbit/s.


Note: Your bandwidth is not constant, these are more like averages, so your upload speed may vary depending on network conditions. If you have a lot of wireless users on your network, you may want to configure or purchase network hardware that prioritizes the hardware streaming encoder to get the majority of the upload bandwidth when in use. This is known as Quality of Service (QoS).


Installing DVS-200


The DVS-200 when you first install it runs in a free mode. For this guide, you need a license for the full version, to take advantage of its advanced features.


Please carefully follow pages 1 - 5 (7 - 11 in the PDF) of the DVS-200 Manual for steps on how to:

 
  • Create a Droplet (aka Cloud Server) on Digital Ocean
  • Deploy (aka Install) the DVS-200 server software
  • Log into your new server and create a channel
 

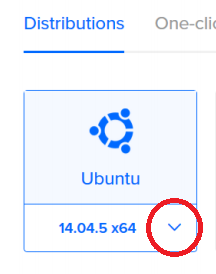
A droplet is like a virtual server, where you lease processing power and storage from a service provider. It's a lot easier than building your own.


In this guide, we chose Digital Ocean for its simplicity, but please follow the steps in the manual exactly as written, or your server may not work correctly, and require you to start over.


Common issues users run into are:

 
  • Choosing the wrong version of Ubuntu Linux for the droplet
    • You must choose Ubuntu 14.04.5 x64
      • Other versions will not work with the software
    • Under each operating system icon, there is a drop-down menu to select the correct version. The default version is not compatible.


  • Not choosing the server location closest to you
    • If you are in the United States, do not choose London
 
  • Not correctly pasting the commands for the "User Data" box
    • If you have issues copying and pasting the installation script commands on page 3 of the manual (9 of the PDF), download this .TXT file
    • Open the file, and press ctrl-A to select all text, then ctrl-C to copy to your clipboard
    • Go back to your Digital Ocean setup page and click inside the User Data text box, then press ctrl-V to paste the commands
      • Note: The .txt file is not a script file, it is the commands properly formatted to paste into the User Data box on Digital Ocean
 
Once the Droplet is created, you will see in your Digital Ocean console an IP address comprised of 4 numbers with periods in-between, this is the location of the server on the internet. This is the URL for your DVS-200 software, it can accessed from any computer with a web browser and internet connection.

Note: This is a public IP, so anyone with this IP address can access the login page. This is different from the local IP addresses on your LAN (aka Local Area Network). LAN addresses typically start with 192.168.x.x or 10.0.x.x.

Once you login, enter the default username admin and password 000000 (zeroes). You will now see the DVS-200 interface via the Live tab.

Along the top, you will see other tabs, you want to click on the Settings tab. Scroll to the bottom of the page, and on the lower right corner of the Settings menu, and click on the words Manage Licenses. Assuming you already purchased a DVS-200 license from your Datavideo re-seller, you would have received a .zip file that is a string of letters and numbers. Extract the .lic file inside with the same name, and follow the onscreen instructions to browse for the .lic file and upload it to the server.

Once completed, after approximately 60 seconds you should be able to access the Live tab again. Click the words Create New Live Channel and give it a name, making sure to put underscores between each word.

Leave all the settings as their default, scroll to the bottom of the page, and click the Save Channel button.

Keep this page open in your browser, you will need to come back to it when you finish setting up the NVS-25.
 

Setting Up Stream Box


This guide covers our NVS-25, NVS-31, and NVS-40. The NVS-31 is built into our HS-1300, HS-1600T, and HS-3200 Mobilecast switchers.

Please reference this support article for recommended encoder settings.


Connecting to Stream Services


If connecting to YouTube Live, please read this article about optimizing latency.

How to find RTMP URL for:
YouTube
Facebook
DaCast
Livestream
UStream


Setting Up DVS-200


Please note that transcoding with a cloud droplet can severely impact performance. If you notice any dropouts or issues, please click on Stats and check the CPU meter. If it is stuck at 100%, then transcoding may be the issue.

ADICIONAL
DVS-200

WHAT CAN WE HELP YOU WITH??

Datavideo support is here to help.