There are three keying modes available on the SE-650, SE/HS-1200/1300: Linear, Luma, and Chroma.
This guide will focus on the Luma keying. For guides on the other modes, please see the following:
Linear Key Setup Guide
Chroma Key Setup Guide
First, connect your graphics source to an input on your switcher, like a laptop outputting Powerpoint with HDMI.
Confirm you have video displaying from that input in the multi-viewer
Then, on the switcher's keyboard control panel, press Menu
In the menu, press the down arrow key to go to the Keyer submenu
On the first line, next to the Keyer section, make sure it says Key 1
In the Keyer Ctrl section, make sure it says Luma, followed by Self, followed by Priority Top
In the Key Source Section, change the Input to the one with your graphics source. That means if you connected the laptop to input 5 with an HDMI cable, change the setting to Input 5.
Disregard the Fill setting.
Leave the Mask setting alone as well, unless you need to cover up part of the graphics, it's the same as a garbage matte
Exit the menu by pressing the Menu button twice
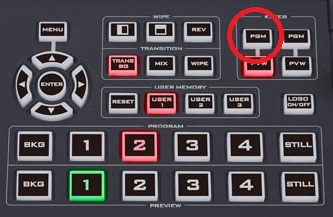
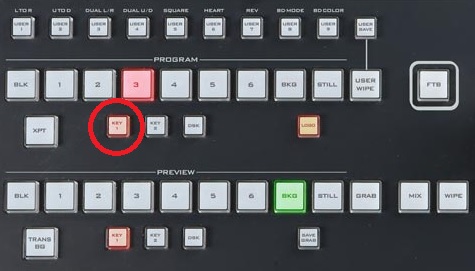
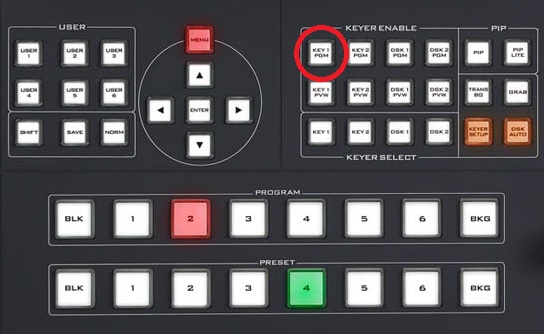
On the switcher's keyboard control panel, it varies by model, so please see below and press the following: