On your switcher, you can usually find this information in the Setup menu, as you will see on the SE-1200.
On the TC-200, you can set the matching video standard by setting DIP Switches 1 through 3 to the matching combination on the below table:
| DIP Switches 1 to 3 |
Resolution | Frame Rate |
| 000 | 1920x1080i | 50Hz |
| 001 | 1920x1080i | 60Hz |
| 010 | 1920x1080i | 59.94Hz |
| 011 | 1280x720p | 50Hz |
| 100 | 1280x720p | 60Hz |
| 101 | 1280x720p | 59.94Hz |
| 110 | 720x576i | 50Hz |
| 111 | 720x480i | 59.94Hz |
So if the switcher is set to 1080i 59.94, set the TC-200 DIP Switches 1 through 3 to Off On Off, or 010.
Then set DIP Switches 4 through 5 to Off On, or 01.
So, your switches from left to right should be Off On Off Off On Off, or 010010.
Note: Always leave DIP switch 6 Off. Turning it on disables the other DIP switches and may cause a video format mismatch with your CG software.
Note: Whenever you change DIP switches, make sure to disconnect power and reconnect again to reboot the TC-200.
Cable Connections:
Next, power on the TC-200, then click the Start button in Windows 10 and begin typing "Change Display Settings" until it appears on the list, then click on it to open.
You should see two monitors depicted in the settings. If you do not, scroll down to Multiple Displays, make sure the drop-down option reads, "Extend These Displays".
Click on monitor 2 so it is highlighted in blue. Scroll down to resolution and make sure it matches your switcher and TC-200, which will be either 1920x1080 or 1280x720.
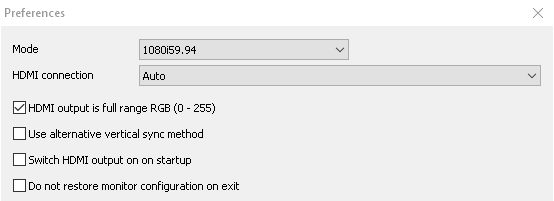
Next, you will configure your CG software's video standard to match your TC-200 and video source:
Congratulations, you now have the TC-200 integrated into your workflow! There are additional ways to configure it, depending on your preferred workflow and switcher channels available.
For a more advanced guide that covers upstream keying as well, and configuring the SE-1200's keyers, please read the Advanced Guide. Please let us know if you have any questions or suggestions.