Please note that the optional RMC-230 controller currently only works with the Sony MCU system and cameras and there is not a function to verify the firmware version. It is recommended to run the latest firmware update and note on your unit that it was updated
The MCU-100, MCU-200, MCU-100P, and MCU-200P units are version 3.203 now, but have different firmware files. The hardware is nearly identical, and the P version has the same features as the non-P version. Please make sure you update the respective units with the correct files. The AD-1 and AD-1P use the same file, but have different update procedures.
Please note that if you install the incorrect firmware file on your MCU, it will not function. But this is an easy fix, you can download the correct file and re-flash the unit, it will function normally and not be corrupted.
To determine whether or not you have the "P" version, here is a list of non-P version serial numbers: 00380019-00413018, 00414986-00414997, 00417254-00417265.
Another way to check is to see if the front of the unit reads 100 or 200 in a blue box, and the silver sticker on the back has a printed firmware version of 1.8. If so, it is the MCU-100/200 and not the MCU-100P/200P, contrary to the silver sticker reading MCU-100P/200P. The initial release version of the MCU-100P/200P firmware was 0.3.
The MCU-100S and MCU-200S are version 0.407 now, and use the same firmware file. The AD-1S is version 0.6. The optional RMC-230 iris controller is version 0.9.
The MCU-100J and MCU-200J each use a different firmware file, unlike the P and S models.
-Power off the MCU, and connect a USB cable to the MCU and PC
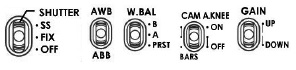
-Move those 5 three-way switches on the MCU to their center position
-Push and hold the AWB/ABB toggle switch to up AWB position and press and hold in the small rotating menu knob at the same time before powering the MCU on
-The display will read “L-0.6” or similar
This is the bootloader version, not the firmware version, you can ignore this
-Your PC will treat the MCU as a removable disk, like a thumb drive
-Select it in Windows Explorer and delete the existing file bootcode.bin
Not doing so will prevent you from copying the new file, there is not enough space for both
-Copy the new MCU firmware file, do not change the file name
-Power off and on again, the firmware loads automatically upon booting
The AD-1P, AD-2P, AD-1S, AD-2S, and AD-1J are updated via USB. Please note that Windows 7 is required for updating all AD-1's, there have been reported issues with Windows 10 not detecting AD-1 units or causing updates to fail. MacOS is untested.
Important Note: Updating using Windows 10 will cause the unit to not be recognized by the MCU. Using Windows 7 compatibility mode on Windows 10 will not resolve this issue. The MCU main unit is not affected by this issue.
-Connect the AD-1P/S/J to a PC via USB
-Your PC will treat the MCU as a removable disk, like a thumb drive
-Select it in Windows Explorer
You will notice that it is empty, this is normal
-Copy the .bin file to the AD-1's disk, do not change the file name
If you experience any issues copying the file or confirming the updated version, change the following file properties in the image below. Right click on the firmware file, click "Properties", then under Security, click the "Unblock" button. If this does not resolve the issue try a different USB cable (a shorter or higher quality cable), USB port (rear ports instead of front ports), or computer. Please note that in making these changes to your Windows system you are doing so at your own risk, if you need additional assistance, contact Microsoft Support.

-Safely remove the AD-1's disk from your PC, and then connect it to a camera and MCU to check the firmware again and verify the update was successful
There is no need to connect the AD-1 to your PC again unless the update failed. Reconnecting it will not help to verify the firmware copied successfully, the AD-1 will appear empty in Windows Explorer. The only way to verify is via the MCU/RMC hardware by following the steps at the top of this document.
If the update fails, there may be a compatibility issue with your version of Windows, PC hardware settings, Bluetooth settings, USB devices already connected, or 3rd party software installed. There is no simple solution for this issue, but two good starting points would be to try the utilities in these Microsoft articles. Please note that in using these utilities provided by Microsoft, you are doing so at your own risk. If you need additional assistance, contact Microsoft Support.
Automatically Diagnose and Fix Windows USB Problems (Windows 7/8/10 only)
Hardware Devices are not Working or are not Detected in Windows (Windows 7/8 only)
If you experience an issue where you are unable to safely remove your hard drive from Windows 7, please see this excerpt from the following guide. Please note that in making these changes to your Windows system as suggested by a third party you are doing so at your own risk. If you need additional assistance, contact Microsoft Support.
-First open Service Manager and ensure that the Bluetooth Support Service is running and set on Automatic.
-To open the service manager, press the start button and type in "Services", you should see an icon with gears.
-Next, open Device Manager and open the Properties box of Disks. Under Policies, ensure that Enable Write caching on the disk is checked. This should then actually work.
-Now right-click on the USB Drive and from the same location in the Properties, change the default setting and select instead Better Performance.
-Now go back to the default Quick Removal setting again.
Please let us know if these updates resolve any issues you have experienced, as well as the camera models you use with them, we hope to improve this list with your feedback!